Your cart is currently empty!
How to Install Toilet Partitions
How to Install Toilet Partitions
Learn how to install your toilet partitions from the experts at Partition Plus
Get Your Instructions
Bobrick
Bobrick
Hadrian
Hadrian
Scranton
Scranton
Bradley
Bradley
ASI
ASI
Bobrick Installation Instructions
- 1080 DuraLineSeries Phenolic
- 2080 Maximum Privacy DuraLineSeries Phenolic
- 1030 TrimlineSeries and 1040 DesignerSeries High-Pressure Laminate
- 1540 ClassicSeries High-Pressure Laminate
- 1550 MetroSeries and 1530 AccentSeries High-Pressure Laminate
- 2030 TrimLineSeries and 2040 DesignerSeries High-Pressure Laminate
- 1090 SierraSeries SCRC
Phenolic
High Pressure Laminate
Composite
Hadrian Installation Instructions
- Solid Plastic
- Standard Powder Coated Steel
- Elite Powder Coated Steel
- Standard Stainless Steel
- Elite Stainless Steel
Solid Plastic
Powder Coated Steel
Stainless Steel
Scranton Installation Instructions
- Hiny Hiders Solid Plastic
- Aria Solid Plastic
- Eclipse Solid Plastic
Solid Plastic
Bradley Installation Instructions
- Series 400 – Phenolic
- Series 400 69-72″ – Phenolic
- Series 500 – Phenolic
- Series 600 – Phenolic
- Series 700 – Phenolic
- Series 700 69-72″ – Phenolic
- Series 400 – Powder Coated/Stainless Steel
- Series 400 69-72″ – Powder Coated/Stainless Steel
- Series 500 – Powder Coated/Stainless Steel
- Series 600 – Powder Coated/Stainless Steel
- Series 700 – Powder Coated/Stainless Steel
- Series 700 69-72″ – Powder Coated/Stainless Steel
- Series 400 – Bradmar Solid Plastic
- Series 400 69-72″ – Bradmar Solid Plastic
- Series 700 – Bradmar Solid Plastic
- Series 700 69-72″ – Bradmar Solid Plastic
Phenolic
Powder Coated and Stainless Steel
Bradmar Solid Plastic
ASI Installation Instructions
Before You Install
- Store your toilet partition pieces indoors in a clean dry area
- Check all your pieces and hardware immediately when you recieve your bathroom partitions. By taking note of any missing or damaged pieces you can contact your supplier and have the pieces quickly replaced.
- Always store your toilet partitions flat, stacking them upright can cause the partition material to warp
- Ensure you have the correct safety supplies. We recommend having another person with you while installing bathroom partitions for safety.
- Look to see if your floor has any uneveness, you will want to take it into account when installing the partitions to make sure all pieces are level.
- Check and double check your measurements before drilling holes and installing pieces. If you have any confusion feel free to call the Partition Experts at Partition Plus.
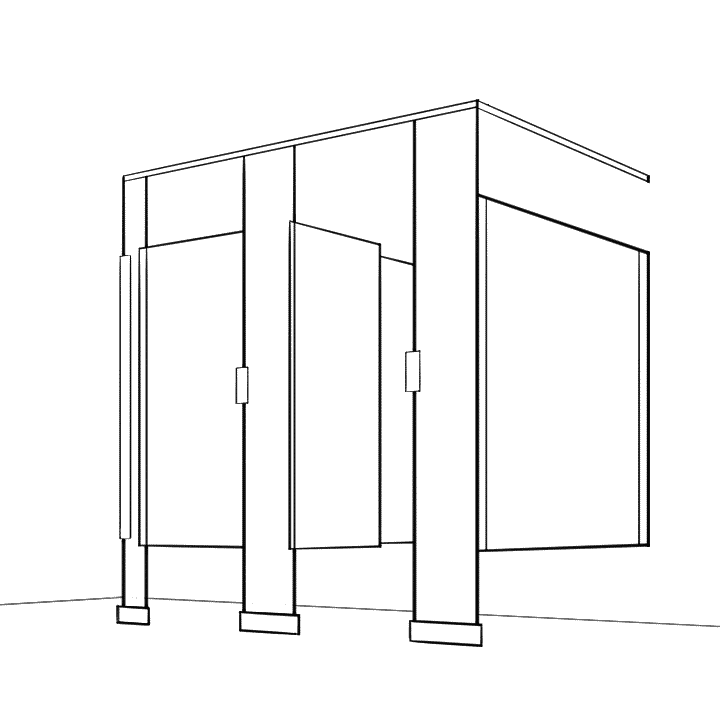
Learn the Parts
Panels
Panels are the pieces that separate the different stalls. They come in various sizes depending on stall depth and privacy level.Pilasters
Pilasters are the pillars on either side of the doors that anchor to either the ceiling or the floor (sometimes both) and support the door.Doors
Partition doors are just like any other doors, they allow access to the stall. They typically swing inward unless they are for wheelchair accessible stalls.Hardware
Hardware for partitions includes screws, bolts, anchors, brackets and sometimes other pieces. They should all be included in a box sent by the manufacturer.Installation Options
Ordering bathroom partitions is a unique experience and one that many businesses and establishments only do once in a period of several years. This unfamiliarity combined with the size and weight of the materials can make installation confusing. Many people are also worried about how much it costs to install toilet partitions. There are two main options when it comes to installing toilet partitions and both can be very cost-effective.
Basic Instructions
We have provided this set of basic instructions for installing toilet partitions. These instructions are meant to simplify and to help explain how to install partitions, however the numbers of brackets, width of materials, and other features may change depending on your brand and material. Make sure you also find your brand and material specific instructions above so you can use the set that is right for you.
Establish the front centerline by taking the overall compartment dimensions and deducting half the thickness of the pilaster. This is where your front brackets will be placed.
Drill holes and install floor brackets in proper locations on the centerline as indicated by your layout drawings
Determine positions for other panels based on layout drawings. Mark with chalk or pencil.
Using your panel locations fasten the two-ear panel brackets to the wall (# and measurements will vary according to brand/material). Corner stalls will have single ear brackets
Rest panel on a 12” block and position in the brackets. Drill a hole through the top bracket and fasten. Keep the panel on the block until the pilaster is installed.
In preparation for placing the wall pilaster, fasten single ear pilaster “F” brackets to the wall. # of brackets and height off the floor will vary according to brand/material.
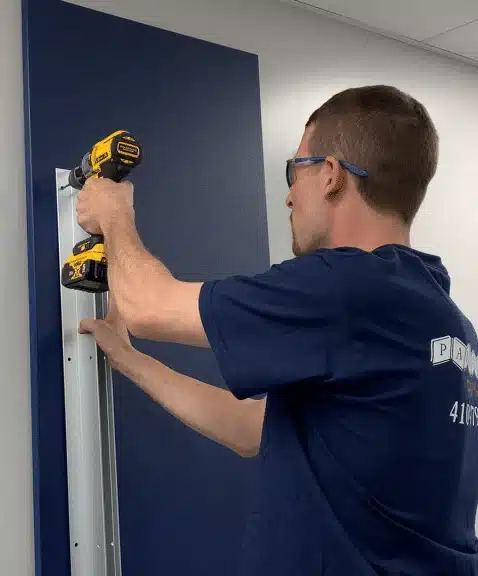
Slide the shoe onto the wall pilaster. Position the wall pilaster in the wall brackets and over floor brackets. Install the levelling device (1). Install the floor bracket hardware and tighten (2). Plumb pilaster and fasten to the pilaster wall brackets.
Prepare the pilaster for the door and fasten the lower hinge to the wall pilaster.
Install the male cam to lower hinge.
Fasten the upper hinge to the wall pilaster.
Place the next pilaster on floor brackets and mark the centerline of the panel on the back. Mark bracket centers according to layout drawing dimensions. Use “U” brackets at templates and drill holes. Remove the pilaster from floor brackets and fasten “U” brackets.
Repeat step 7 with the “U” bracket pilaster. Ensure the pilaster is positioned so the alcove channel grasps panel.
Plumb panel and pilaster. Secure panel to the pilaster “U” brackets.
Prepare the door for hanging. Insert female cam into the bottom-door hinge casting. Install inner and outer knobs on the door. Install the door pulls for outswing and accessible doors only. Fasten coat hook and bumper onto door.
Hang the door, lower it onto the male cam of the lower hinge. Install the threaded upper hinge pin. To set the door at the required angle, loosen the nut of the male cam assembly. Fasten the stop and keeper on the pilaster ensuring it lines up with the door latch. Reverse them for inswing doors.
Erect the remaining components ensuring all pilasters are fastened to floor brackets. Repeat steps 4-10 as necessary. It’s recommended that you only install one compartment at a time.
Fasten headrail brackets to the wall. Measurement above the floor may vary depending on brand/material.
Place the headrail into tops of pilasters and slide into headrail brackets. Two or more pieces may be required due to the width of the configuration. Fasten the headrail to the brackets, install the end cap if required. Adjust leveling devices to level all compartment components.
Fasten headrail to the pilasters using the appropriate amount of screws given your material and pilaster size.
Drill all remaining panel and pilaster holes and fasten the brackets