Your cart is currently empty!
Toilet Partition Parts
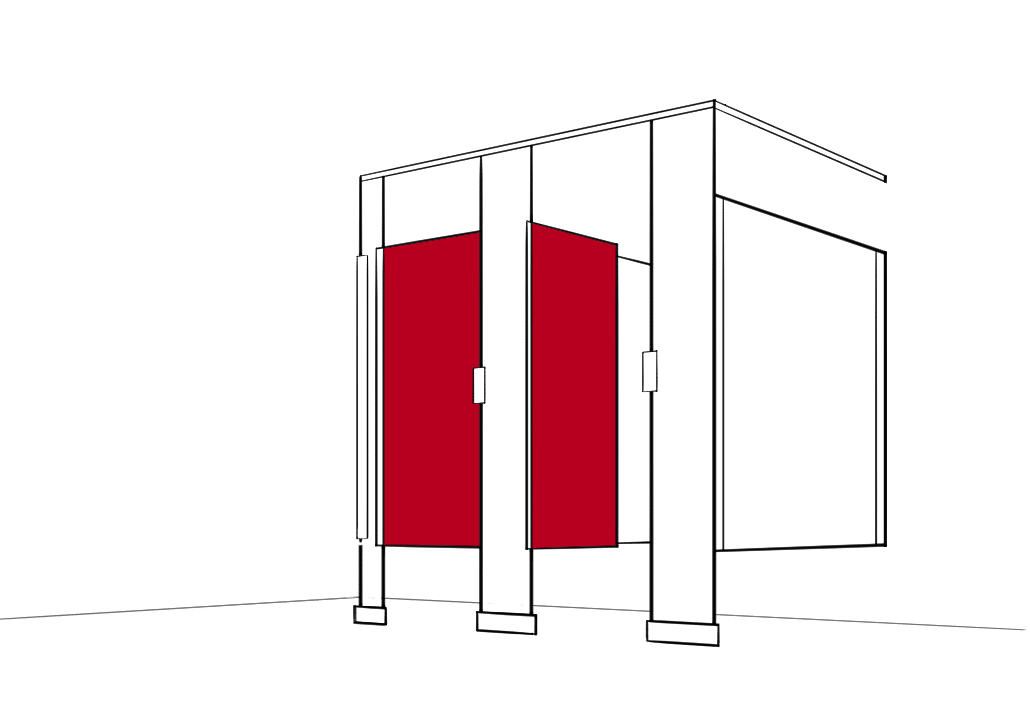
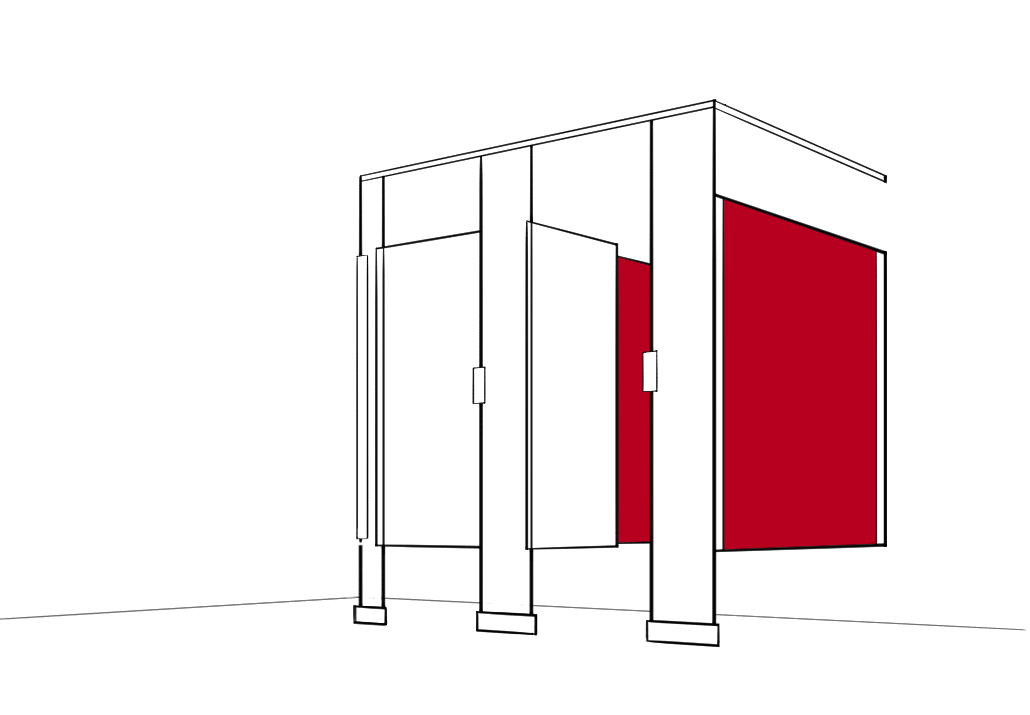
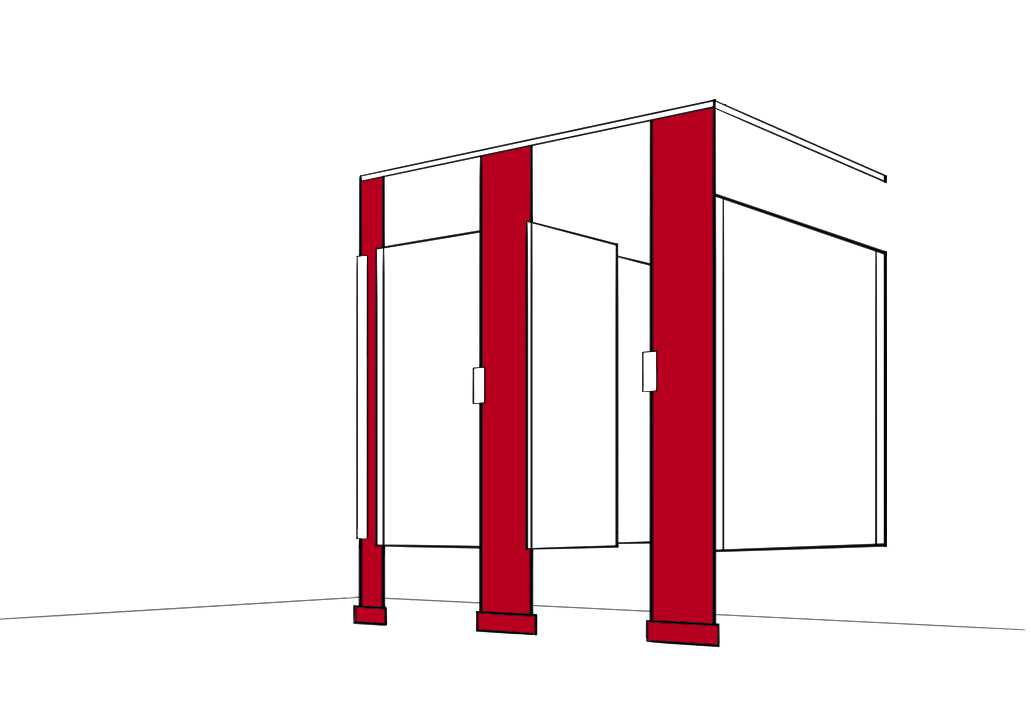
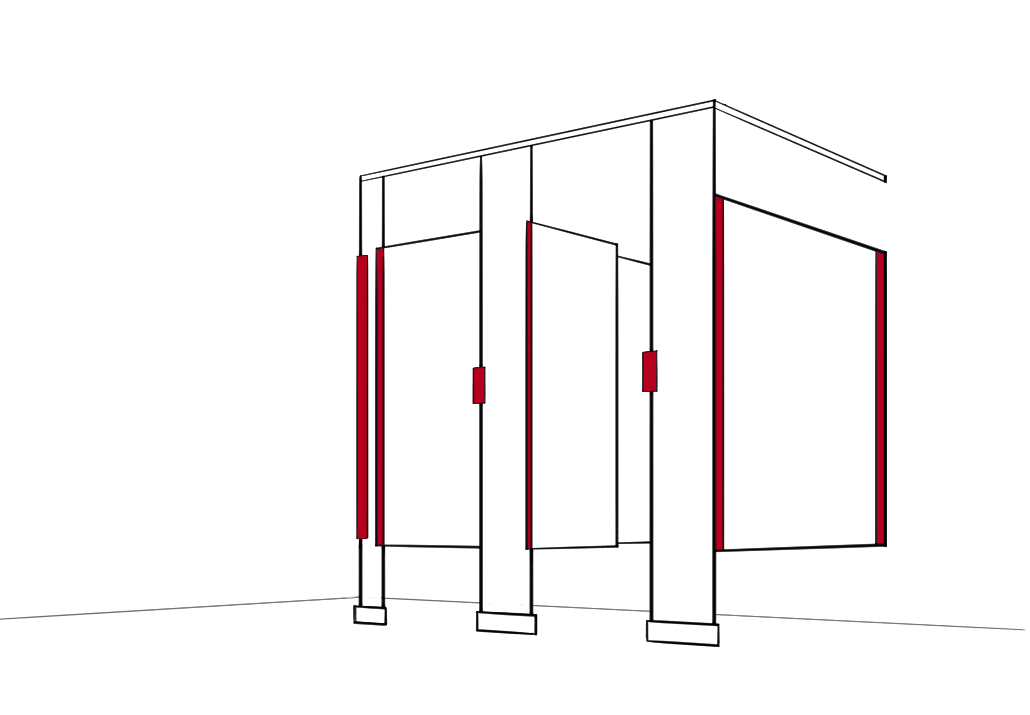
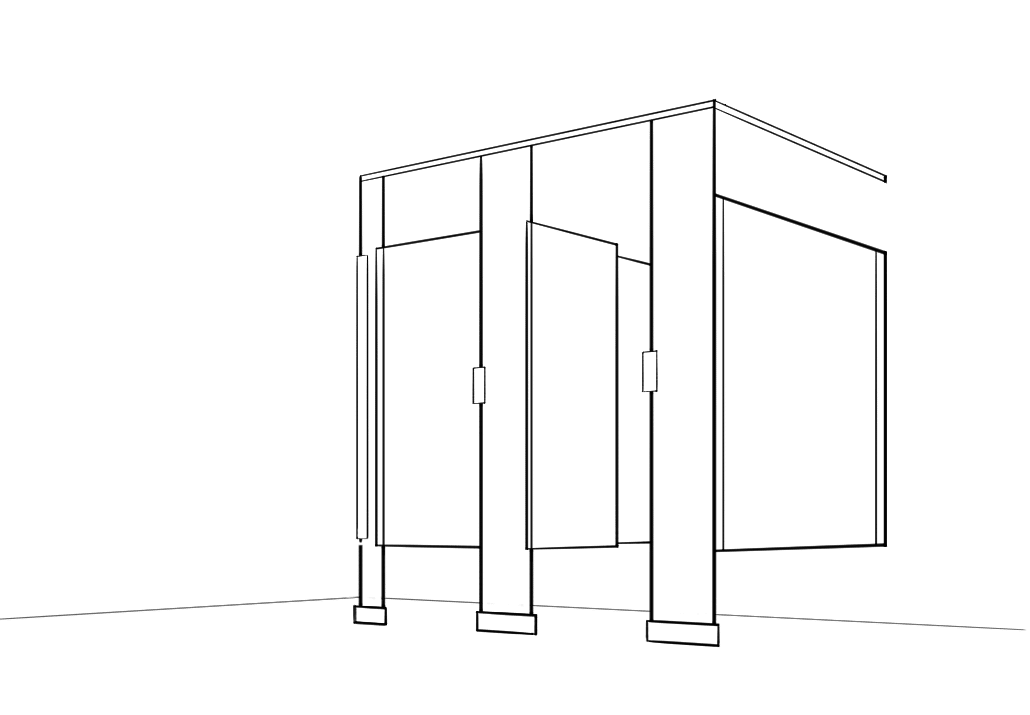
To understand more about bathroom partitions and how to install them it is important to learn about the pieces of partitions, where they go and what they do. Check below for a diagram of a standard floor mounted overhead braced toilet partition and its parts. Read further to find standard sizes of partition pieces and learn more about each part.

Doors
Doors are the part of the partition that allows access into and out of the stalls. They can be made to fit any openings but standard doors are 58” high. Partition doors are made of the same sturdy material as the rest of partitions and with the right installation will last the same length of time and allow easy access for all.
All doors come with all necessary hardware for mounting, and specialty no sightline hardware is also available on request. Doors will be slightly smaller than the opening width selected when ordering to leave space for hardware.
Headrail & Caps
Headrails come in multiple shapes, widths and lengths designed to fit a variety of partition materials. Headrail widths typically come in sizes from ¾” to 1¼” and getting the right match will ensure that your headrail fits your partitions. A great way to ensure you’re getting the partition headrail that you need is to get a headrail created by the same manufacturer as your partitions for the same partition material. Headrails are often made with an anti-grip design that is helpful in preventing damage.
When ordering headrails it is important to purchase the appropriate number of brackets to attach the headrail to the wall on both ends and any caps that are needed to complete the design. Consult your drawings or speak to an expert to ensure that you have the right number of pieces.
Panels
Panels are the walls on the sides of toilet partitions dividing the stalls from one another. These are usually 55” to 58” tall depending on your partition material though they can be made taller for higher privacy stalls. Partition panels also come in reinforced options. This is crucial for installing accessories such as grab bars and toilet paper dispensers to panels.
High privacy and other hardware upgrades are available upon request. Note that panels may be up to ½” narrower than chosen width to allow room for hardware installation.
Pilasters & Shoes
Pilasters are the pillars on either side of the doors in the front of toilet partitions. They can be a variety of sizes to fit the gap between the wall and a door, or between two doors. They can be mounted to the floor by pilaster shoes and additional mounting hardware or the ceiling where they are attached to structural supports. They may also have headrails attached to them depending on their mounting style.
Necessary hardware for installation is included with pilasters.
Hinges, Brackets & Latches
The final parts of toilet partitions are the smallest, but still crucially important to completing an installation. Hinges allow doors to swing open while brackets mount panels, pilasters and headrails to the walls and each other. Finally, latches are what allow doors to lock safely behind occupants.
Hardware pieces like these can come in multiple finishes, sizes and designs. High privacy continuous hardware is popular because it blocks sitelines so that one cannot see into the stalls. Latches come in different designs as well such as those with occupancy indicators. To ensure you have all the hardware you need for your partitions, check the information for the parts you are ordering carefully and if needed purchase additional pieces separately. If you are confused about what hardware you need for your installation, the experts at Partition Plus are here to help, give us a call!
Stalls to Fit Your Bathroom
Every bathroom is different, which means that they require different types and setups of bathroom stalls. Some bathrooms only need a small number of stalls, like the two stalls shown here. Others need ten or even more stalls to accommodate all their guests. Some bathroom stalls are overhead braced like these while others are hung from the ceiling and don’t touch the ground at all. Since bathroom stalls come in many shapes and sizes you may have differing numbers of parts in your setup as compared to another setup.
How to Install Your Parts
So now you understand the different parts a partition setup comes with. Maybe you’ve even received your own order of partitions. Now you need to know what to do with them. Our team is here for you from getting a quote all the way through installation. Watch a video here on how to install partitions or read our helpful How to Install Toilet Partitions guide to get started.
Need some additional help? Don’t worry, we have a team of experts available by phone or email ready to help you through getting your partitions installed. Contact us today!
